System BIOS Settings
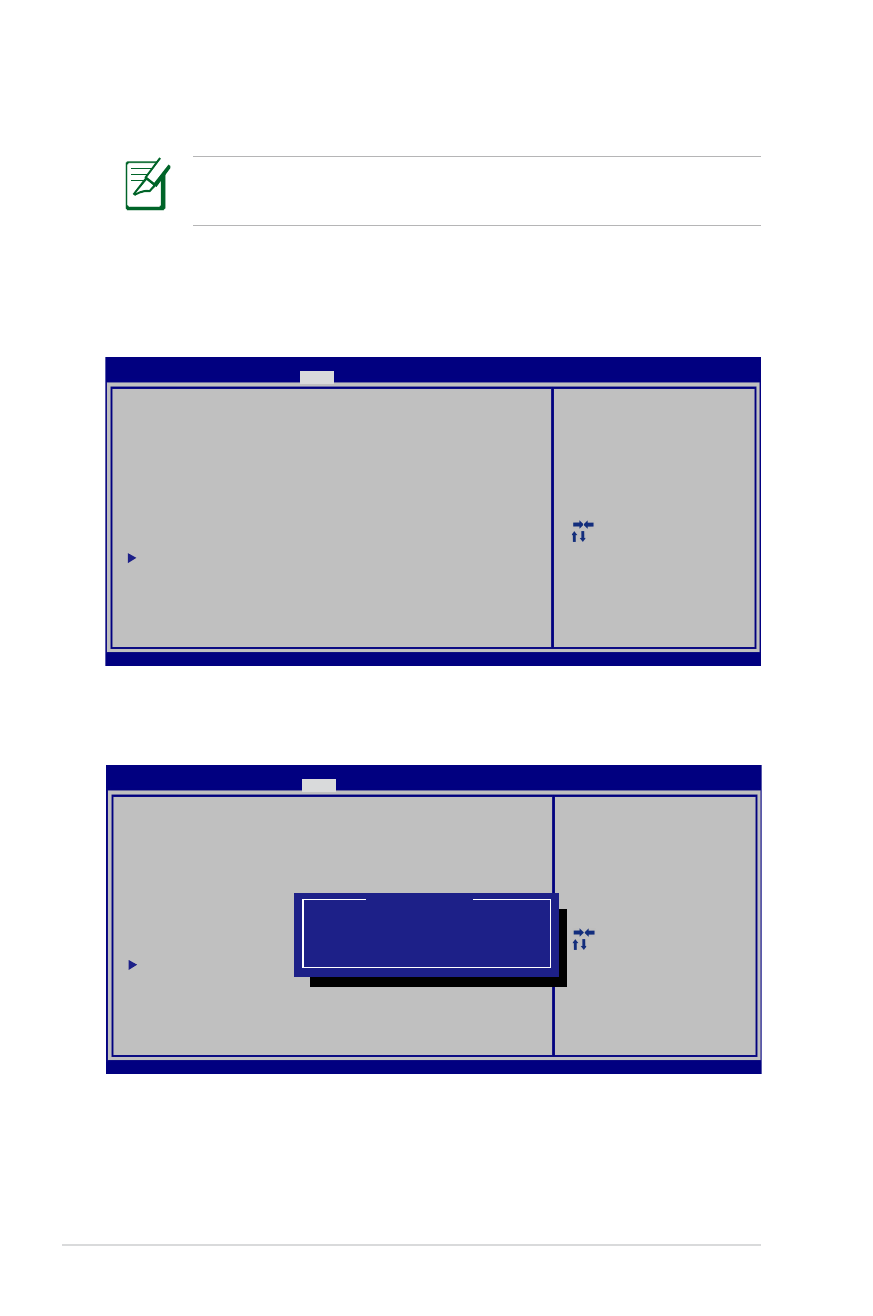
Boot Device
1. On the Boot screen, select Boot Option #1.
: Select Screen
:
Select Item
Enter: Select
+/—: Change Opt.
F1: General Help
F9: Optimized Defaults
F10: Save ESC: Exit
Version 2.01.1208. Copyright (C) 2011 American Megatrends, Inc.
Aptio Setup Utility - Copyright (C) 2011 American Megatrends, Inc.
Main
Advanced
Chipset
Main Advanced Chipset
Boot
Security Save & Exit
Boot Configuration
UEFI Boot
[Enabled]
Launch PXE OpROM
[Disabled]
Boot Option Priorities
Boot Option #1
[P0: WDC WD7500BPKT...]
Boot Option #2
[P2: MATSHITABD-MLT...]
Boot Option #3
[Windows Boot Manager]
CD/DVD ROM Drive BBS Priorities
Hard Device BBS Priorities
Add New Boot Option
Delete Boot Option
Enables/Disables UEFI boot
from disks.
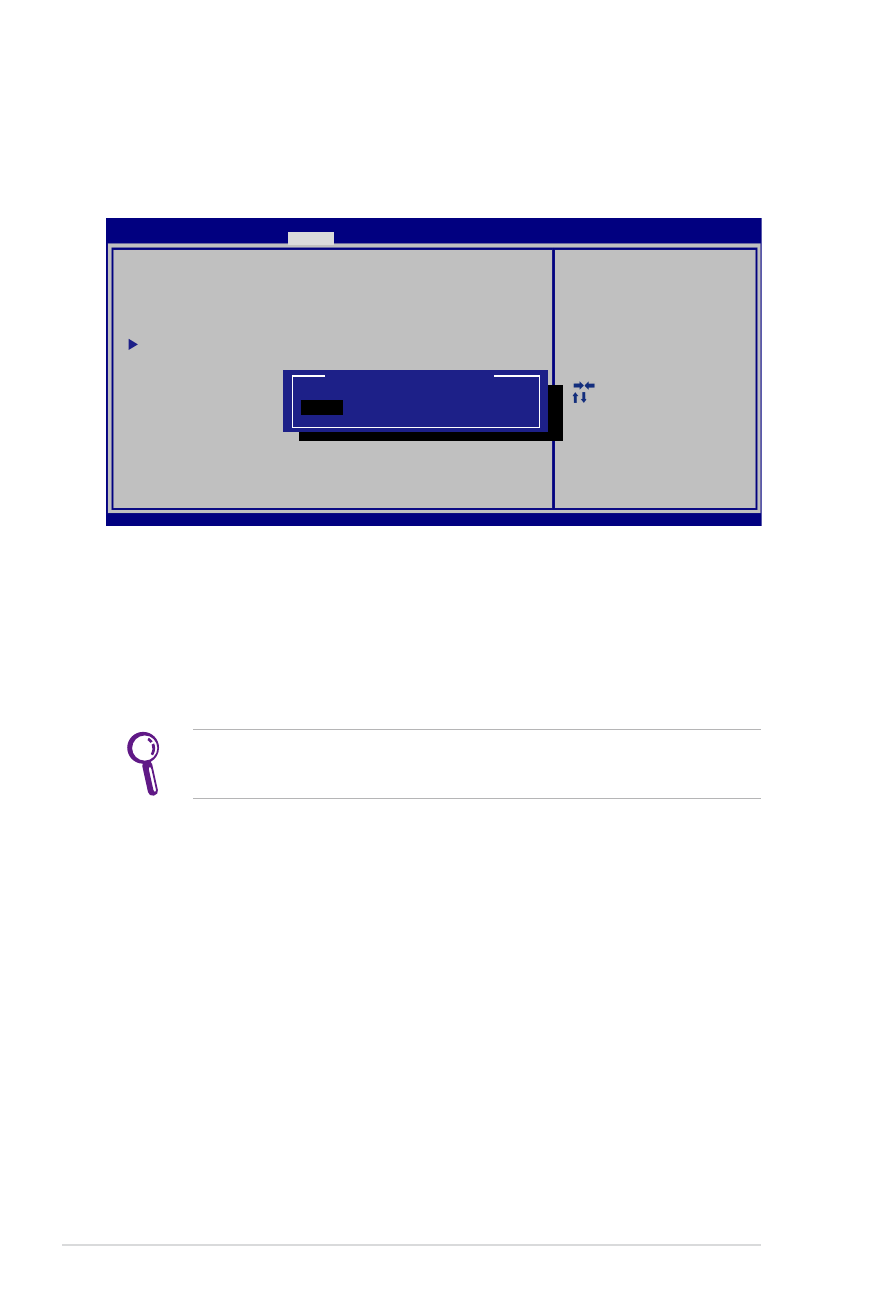
2. Press [Enter] and select a device as the Boot Option #1.
: Select Screen
:
Select Item
Enter: Select
+/—: Change Opt.
F1: General Help
F9: Optimized Defaults
F10: Save ESC: Exit
Version 2.01.1208. Copyright (C) 2011 American Megatrends, Inc.
Aptio Setup Utility - Copyright (C) 2011 American Megatrends, Inc.
Main
Advanced
Chipset
Main Advanced Chipset
Boot
Security Save & Exit
Boot Configuration
UEFI Boot
[Disabled]
PXE ROM
[Disabled]
Boot Option Priorities
Boot Option #1
[Windows Boot Manager]
Boot Option #2
[P0: ST9750423AS ...]
Boot Option #3
[P0: WDC WD7500BPKT...]
CD/DVD ROM Drive BBS Priorities
Hard Device BBS Priorities
Add New Boot Option
Delete Boot Option
Enables/Disables Quiet Boot
option.
Boot Option #1
P2: MATSHITABD-MLT UJ240AFW
Windows Boot Manager
P0: ST9750423AS
Disabled
The BIOS screens in this section are for reference only. The actual
screens may differ by models and territories.

Notebook PC User Manual
A-5
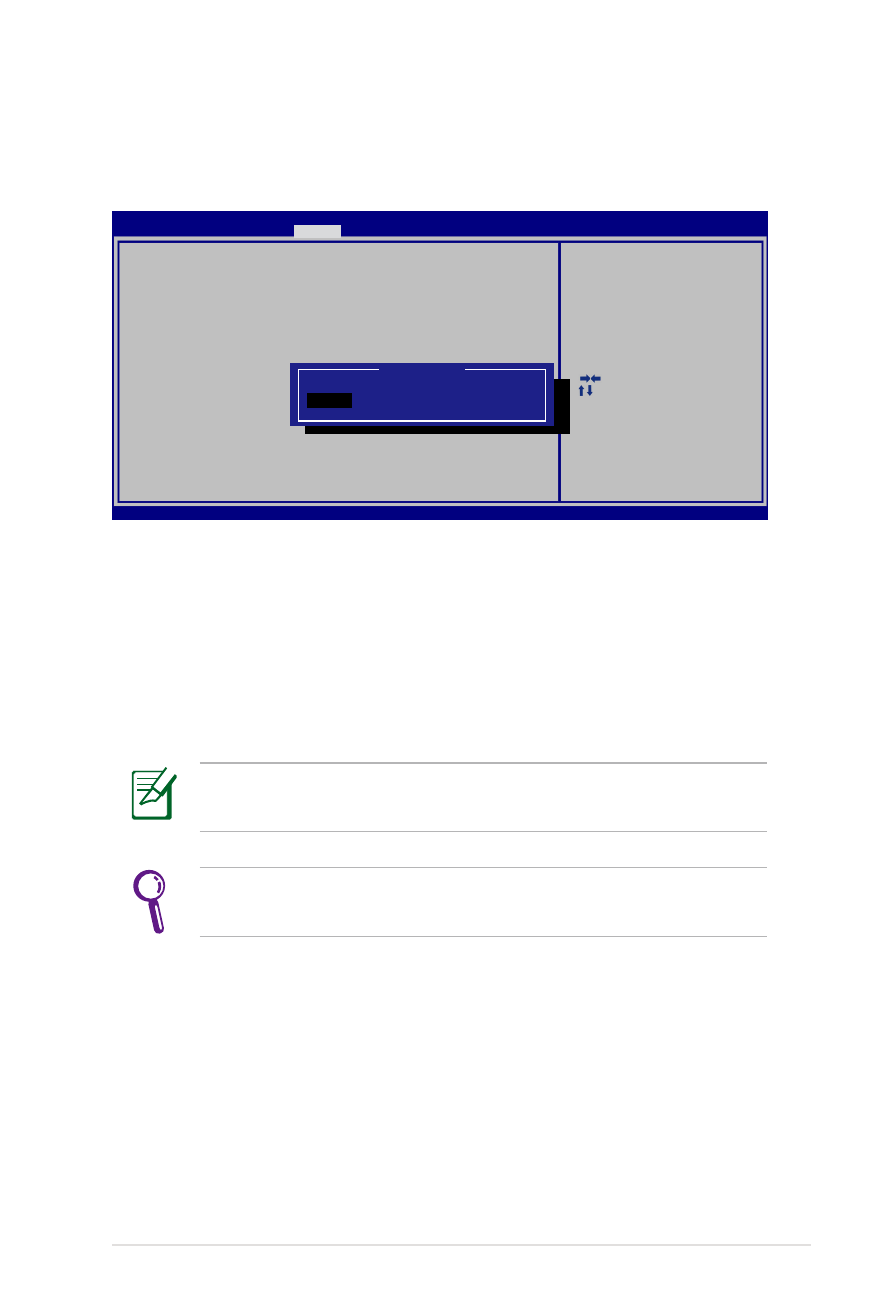
Security Setting
To set the password:
1. On the Security screen, select Setup Administrator Password
or User Password.
2. Type in a password and press [Enter].
3. Re-type to confirm the password and press [Enter].
4. Password is then set.
To clear the password:
1. On the Security screen, select Setup Administrator Password
or User Password.
2. Enter the current password and press [Enter].
3. Leave the Create New Password field blank and press [Enter].
4. Leave the Confirm New Password field blank and press [Enter].
5. Password is then cleared.
: Select Screen
:
Select Item
Enter: Select
+/—: Change Opt.
F1: General Help
F9: Optimized Defaults
F10: Save ESC: Exit
Version 2.01.1208. Copyright (C) 2011 American Megatrends, Inc.
Aptio Setup Utility - Copyright (C) 2011 American Megatrends, Inc.
Main
Advanced
Boot
Main Advanced Boot
Security
Save & Exit
If ONLY the Administrator’s password is set,
then this only limits access to Setup and is
only asked for when entering Setup.
If ONLY the user’s password is set, then this
is a power on password and must be entered to
boot or enter Setup. In Setup, the User will
have Administrator rights.
The password length must be
in the following range:
Minimum length
3
Maximum length
20
Administrator Password
User Password
Secure Boot control
[Enabled]
HDD Password Status :
NOT INSTALLED
Set Master Password
Set User Password
I/O Interface Security
Security Boot Policy
Set User Password
You will be asked to enter the User Password whenever
you power on the Notebook PC (enter BIOS or OS). The
Administrator Password is only asked when you would like to
enter and configure the BIOS settings.
A-6
Notebook PC User Manual
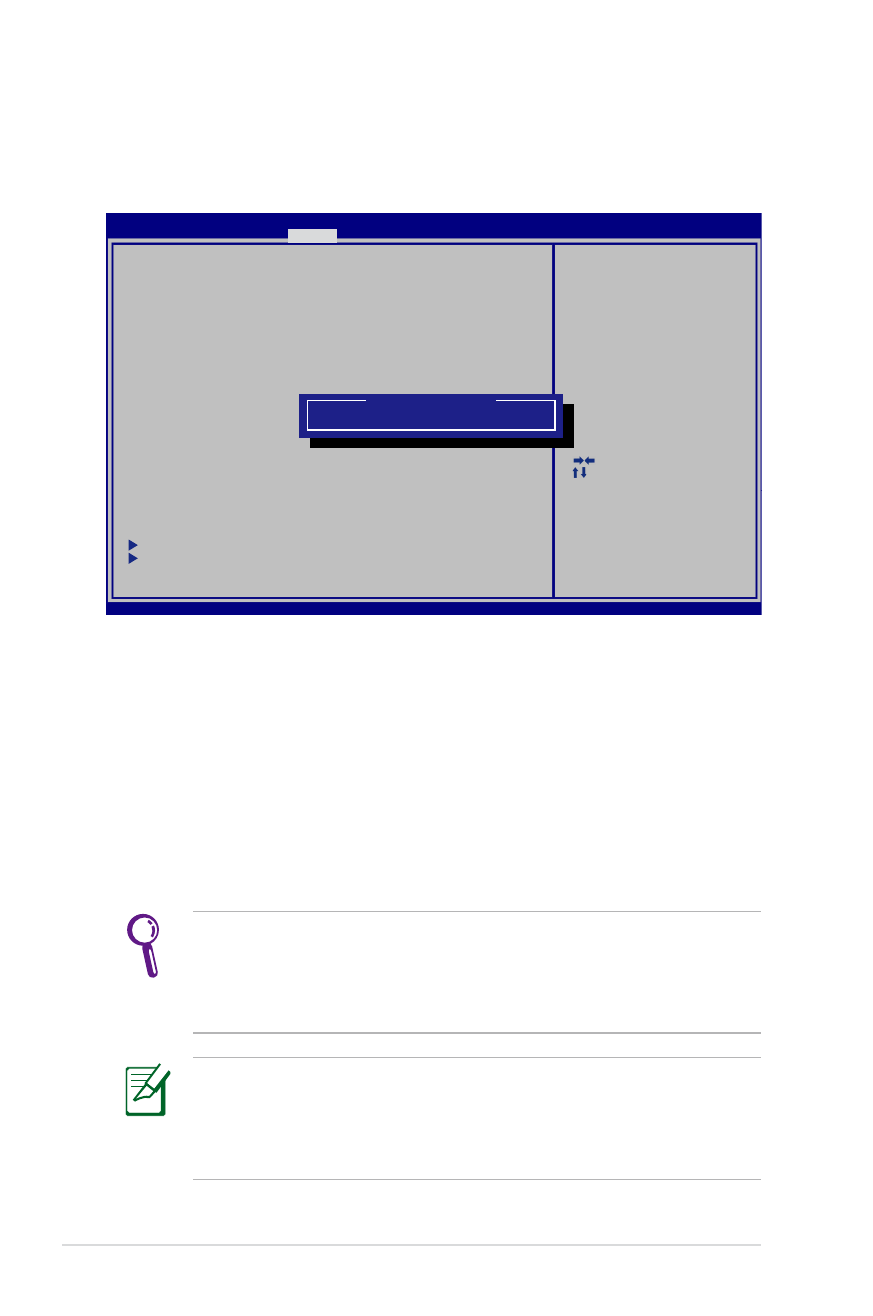
I/O Interface Security
To lock the I/O interface:
1. On the Security screen, select I/O Interface Security.
2. Select an interface you would like to lock and click Lock.
The I/O Interface Security settings can only be altered when
you log in with Administrator privilege.
: Select Screen
:
Select Item
Enter: Select
+/—: Change Opt.
F1: General Help
F9: Optimized Defaults
F10: Save ESC: Exit
Version 2.01.1208. Copyright (C) 2011 American Megatrends, Inc.
Aptio Setup Utility - Copyright (C) 2011 American Megatrends, Inc.
Security
I/O Interface Security
LAN Network Interface
[UnLock]
Wireless Network Interface
[UnLock]
HD AUDIO Interface
[UnLock]
SATA ODD Interface
[UnLock]
USB Interface Security
If Locked, 2nd SATA HDD will be
disabled.
LAN Network Interface
Lock
UnLock
Notebook PC User Manual
A-7
USB Interface Security
To lock the USB interface:
1. On the Security screen, select I/O Interface Security > USB
Interface Security.
2. Select an interface you would like to lock and click Lock.
The USB Interface Security settings can only be altered when
you log in with Administrator privilege.
If you set USB Interface to [Lock], External Ports and CMOS
Camera will be locked and hidden simultaneously.
: Select Screen
:
Select Item
Enter: Select
+/—: Change Opt.
F1: General Help
F9: Optimized Defaults
F10: Save ESC: Exit
Version 2.01.1208. Copyright (C) 2011 American Megatrends, Inc.
Aptio Setup Utility - Copyright (C) 2011 American Megatrends, Inc.
Security
USB Interface Security
USB Interface
[UnLock]
External Ports
[UnLock]
BlueTooth
[UnLock]
CMOS Camera
[UnLock]
Card Reader
[UnLock]
If Locked, all USB device will
be disabled.
USB Interface
LocK
UnLock
A-8
Notebook PC User Manual
HDD Password
To set the HDD password:
1. On the Security screen, click Set Master Password, type in a
password and press [Enter].
2. Re-type to confirm the password and press [Enter].
3. Click Set User Password and repeat the previous steps to set
up the user password.
4. Password is then set.
• The HDD Password can only be altered when you log in with
Administrator privilege.
• You have to set Master Password before setting the User
Password.
You will be asked to enter user password first (if there is one),
then HDD user password when you power on the Notebook PC
and cannot enter the operating system if you fail to enter the
correct passwords.
: Select Screen
:
Select Item
Enter: Select
+/—: Change Opt.
F1: General Help
F9: Optimized Defaults
F10: Save ESC: Exit
Version 2.01.1204. Copyright (C) 2011 American Megatrends, Inc.
Aptio Setup Utility - Copyright (C) 2011 American Megatrends, Inc.
Main
Advanced
Boot
Main Advanced Boot
Security
Save & Exit
If ONLY the Administrator’s password is set,
then this only limits access to Setup and is
only asked for when entering Setup.
If ONLY the user’s password is set, then this
is a power on password and must be entered to
boot or enter Setup. In Setup, the User will
have Administrator rights.
The password length must be
in the following range:
Minimum length
3
Maximum length
20
Administrator Password
User Password
Secure Boot control
[Enabled]
HDD Password Status :
NOT INSTALLED
Set Master Password
Set User Password
I/O Interface Security
Security Boot Policy
Set the system boot order.
***Advanced to Power Cycle
System after Setting Hard Disk
Passwords***
Create New Password

Notebook PC User Manual
A-9
Save Changes
If you want to keep your configuration settings, you must save
changes before exiting the BIOS setup utility.
: Select Screen
:
Select Item
Enter: Select
+/—: Change Opt.
F1: General Help
F9: Optimized Defaults
F10: Save ESC: Exit
Version 2.01.1208. Copyright (C) 2011 American Megatrends, Inc.
Aptio Setup Utility - Copyright (C) 2011 American Megatrends, Inc.
Main
Advanced
Chipset
Boot
Main Advanced Chipset Boot
Security
Save & Exit
Save Changes and Exit
Discard Changes and Exit
Save Options
Save Changes
Discard Changes
Restore Defaults
Boot Override
P2: MATSHITABD-MLT UJ240AFW
Windows Boot Manager
P0: WDC WD7500BPKT-80PK4T0
Launch EFI Shell from filesystem device
Exit system setup after saving
the changes.

A-10
Notebook PC User Manual